

Shopify Can I Add Section In Account Templates?
How to Make Custom Shopify Page Layout Templates
A Fox to Create Beautiful Sections on EVERY Page

You lot don't have an Shopify business relationship? Endeavor it out
This trick will help you to create custom pages that can contain the same sections of the kickoff page in a gratuitous organization.
Before 2018 I used always WordPress and WooCommerce for building webshops. After trying out Shopify for the start time, information technology was clear to me that the user experience as well as the usability in the backend was superior to most competitors. In a handful of projects, I tried out diverse themes ranging from the costless themes created past Shopify to third party paid themes such equally Blockshop, Testament and Prestige. For most of the projects, in that location was a theme that had nearly all features desired past the customer. Virtually of the themes had an outstanding design and good functionality. Nonetheless, in that location was one affair I never fully understood. On almost every theme the selection of all possible sections such every bit parallax, product grid, background video, etc. is restricted only to the start folio of the homepage. Often the offset page had wonderful full-width sections, while other pages did non have the full-width feature. Creating other pages such as About united states, Cloth or Team was constrained in its options and could only be created with a simple editor to fill the page with text or images in the most simple layout.
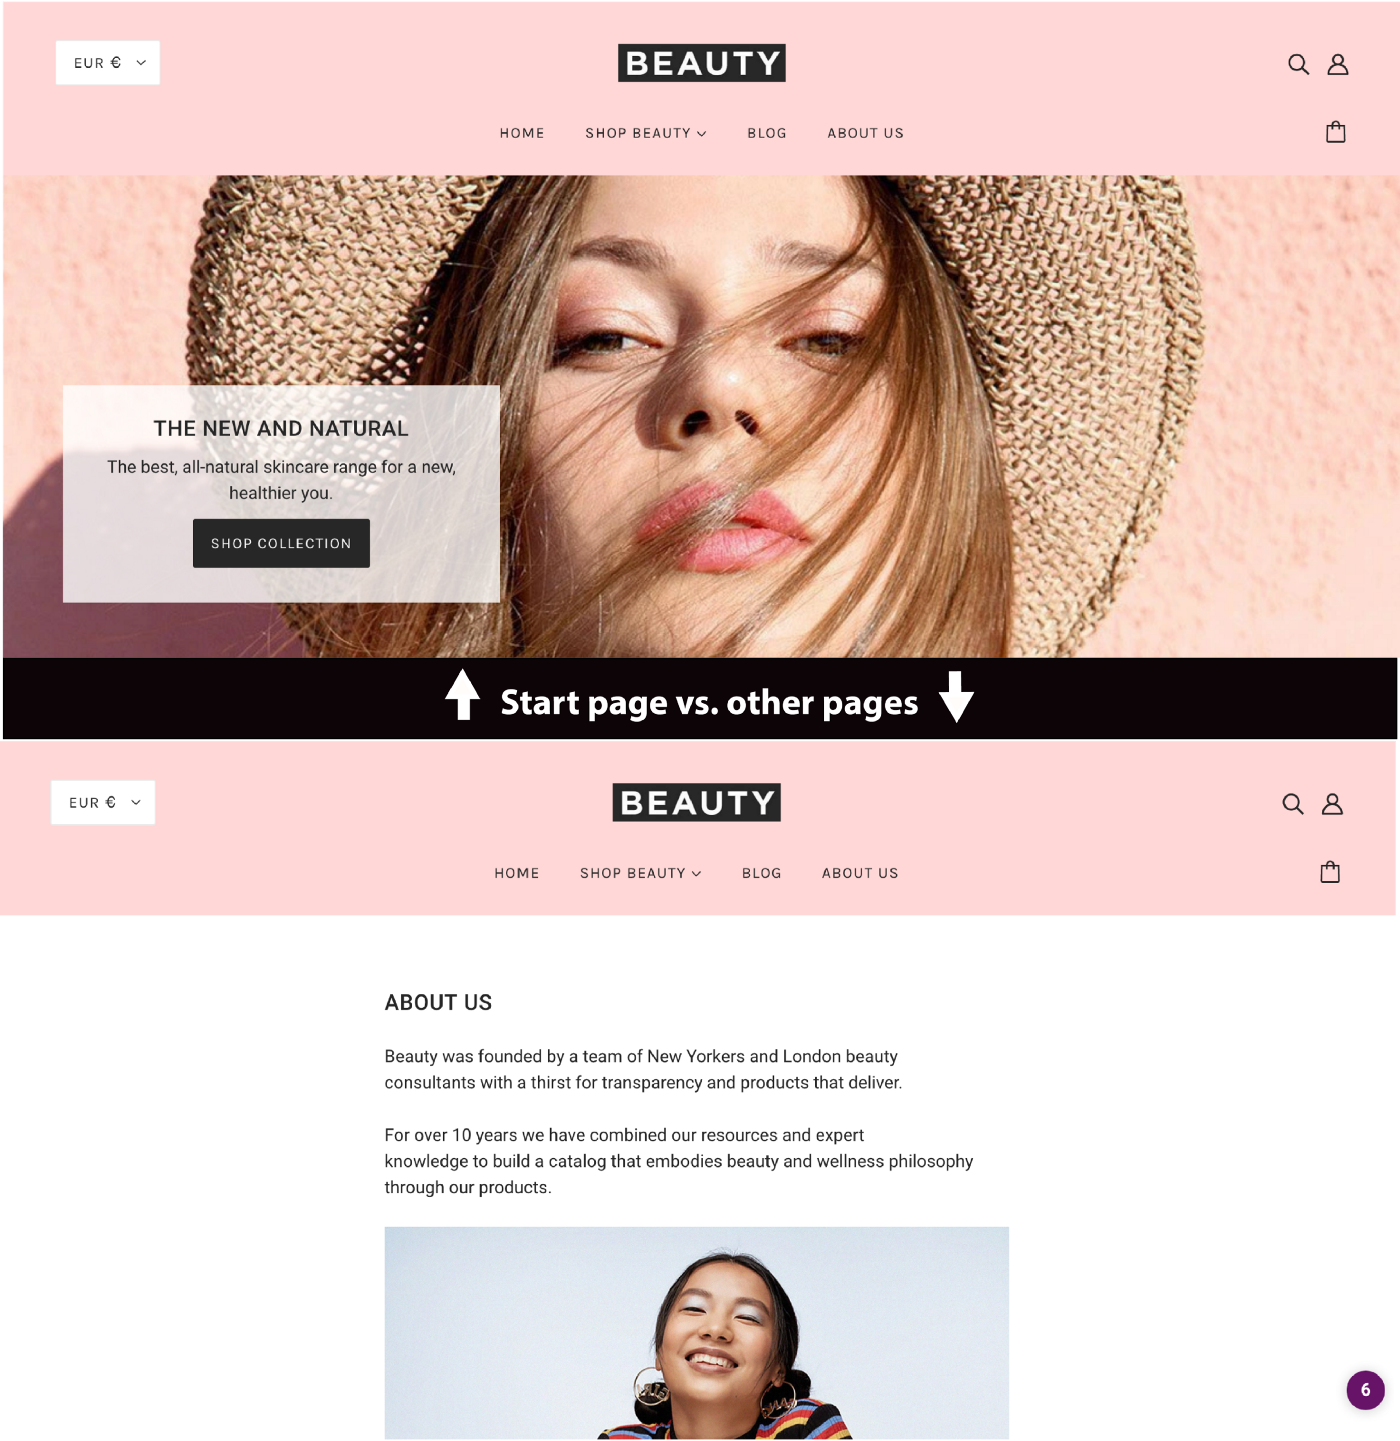
Maybe the intention behind this approach is to tailor the homepage as a whole completely to the shop and that no focus should lay on the informal pages. Having an outstanding start page, but relatively unpleasant other pages downgrades the overall performance of the website. Not consistent pages highlight the quality difference between the pages even more and are immediately perceived as inferior past a normal visitor.
To cutting a long story curt: I needed to notice a solution to bring the page on a consistently high level in functionality and design. And the solution was to offer all sections of the kickoff page likewise on the other pages. And now let'southward see how this works:
Information technology is an easy tutorial for which no (!) coding skills are required. Information technology is actually only a little copy and paste in the right sections. You can easily follow the steps.
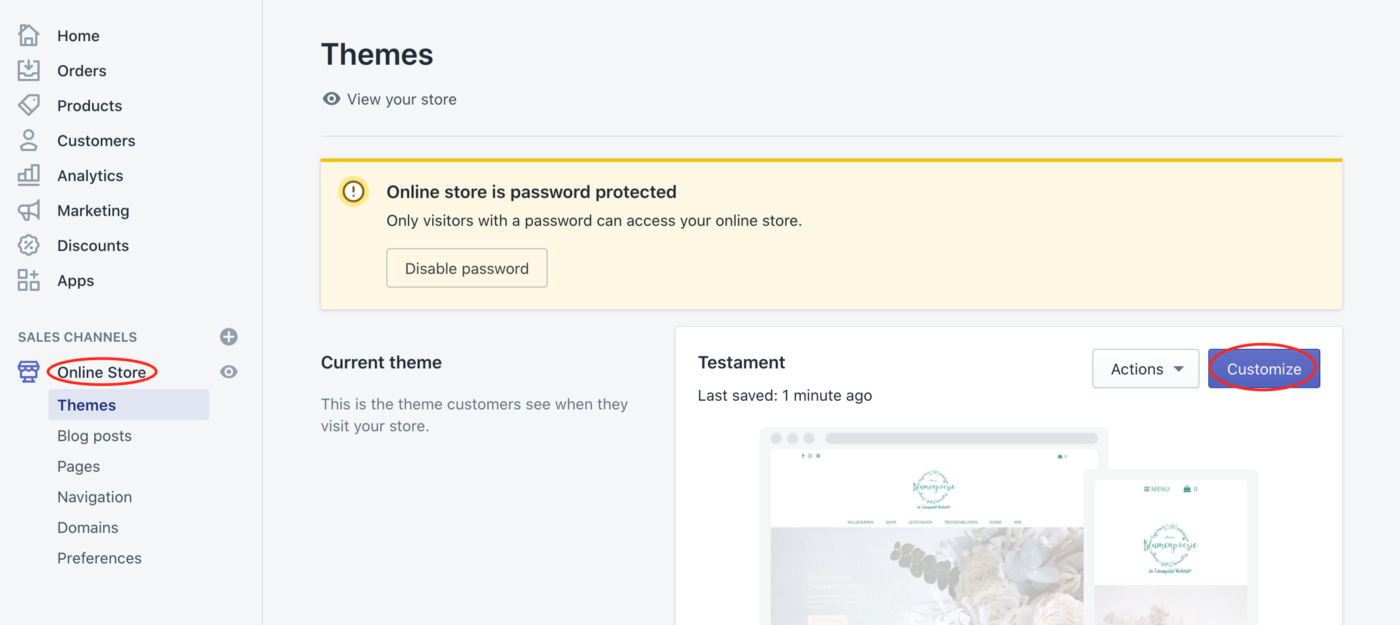
Login your Shopify account and click on the left menu on Online Store. The folio below should be visible. Go and then on Deportment and open the code via Edit lawmaking.

The following window should be opened. On the left side, you can see the construction of your folio with folders such as Layout, Templates, Sections, etc.
A template contains sections. If you go along a start page and see at that place a product slider, an Instagram feed, and a newsletter registration course then the start page template contains iii sections: a production slider section, an Instagram section, and the newsletter section.

Open the Templates binder and click on the blue Add a new template.
Now the following window will be opened. Select page in the driblet-down menu and enter in the 2nd field a name (due east.g. mypage) which is different from the existing names and which you recognize easily as the template you manually added. Click then on create template. A tab will exist opened, just allow information technology open and proceed.
Want to become started? Check out Shopify

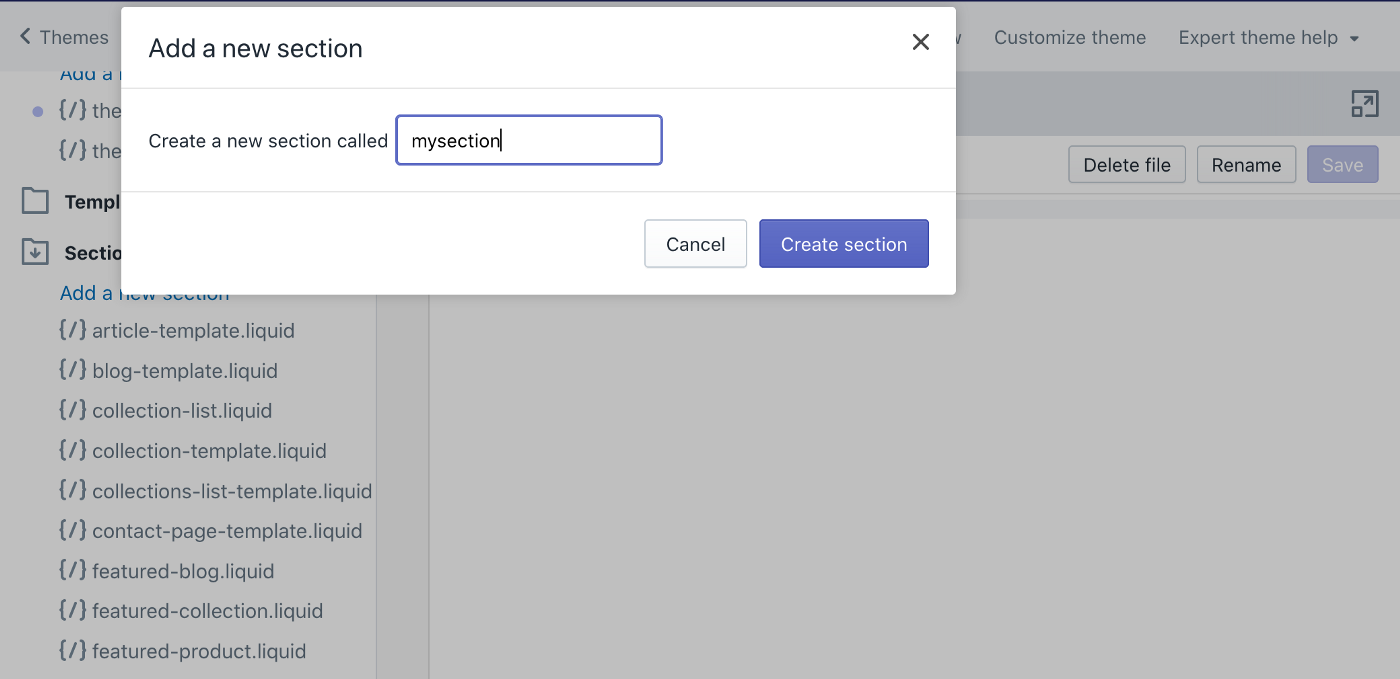
Now we need to fill sections into the new template. Scroll down to the sections folder in the left menu and click on the bluish Add a new department and enter a name (e.m. mysection).
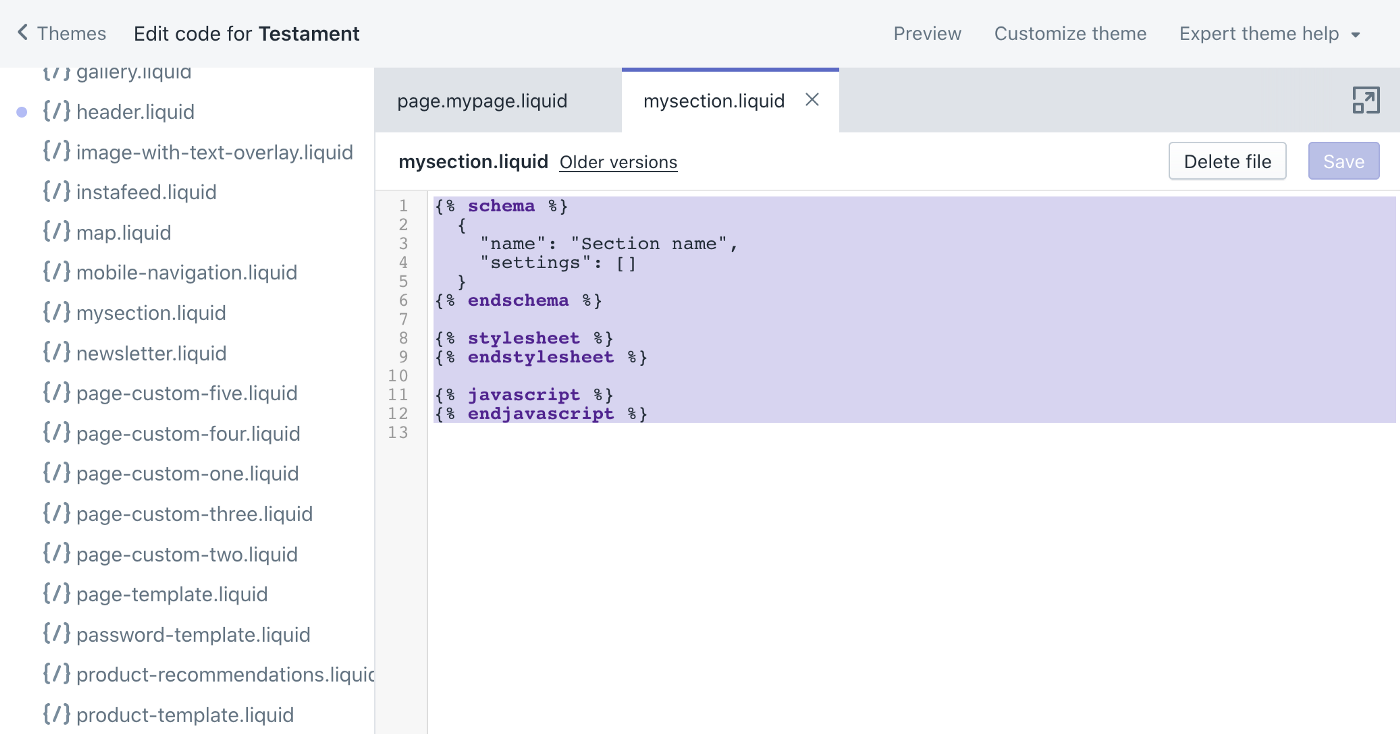
Mark the content of the new section and delete it.
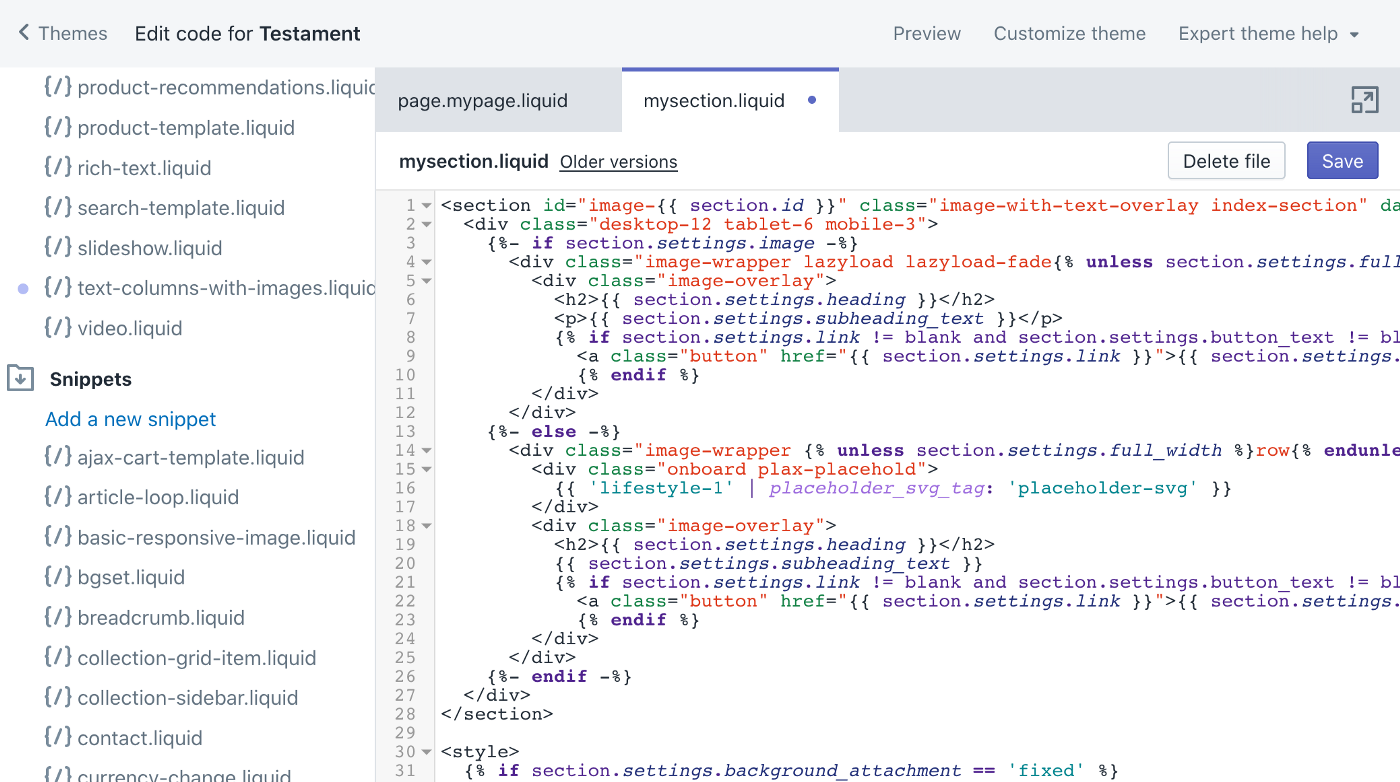
Now nosotros need to fill some lawmaking into that section. Depending on what kind of department you want to add, you have to navigate to the code of the existing section. Let'due south say you want to add an prototype with text overlay. Then you need to get to the existing section file named prototype-with-text-overlay.liquid as can be seen below. Copy the whole code and fill up information technology in the empty mysection.liquid.

The content of image-with-text-overlay.liquid and mysection.liquid should now be equal.
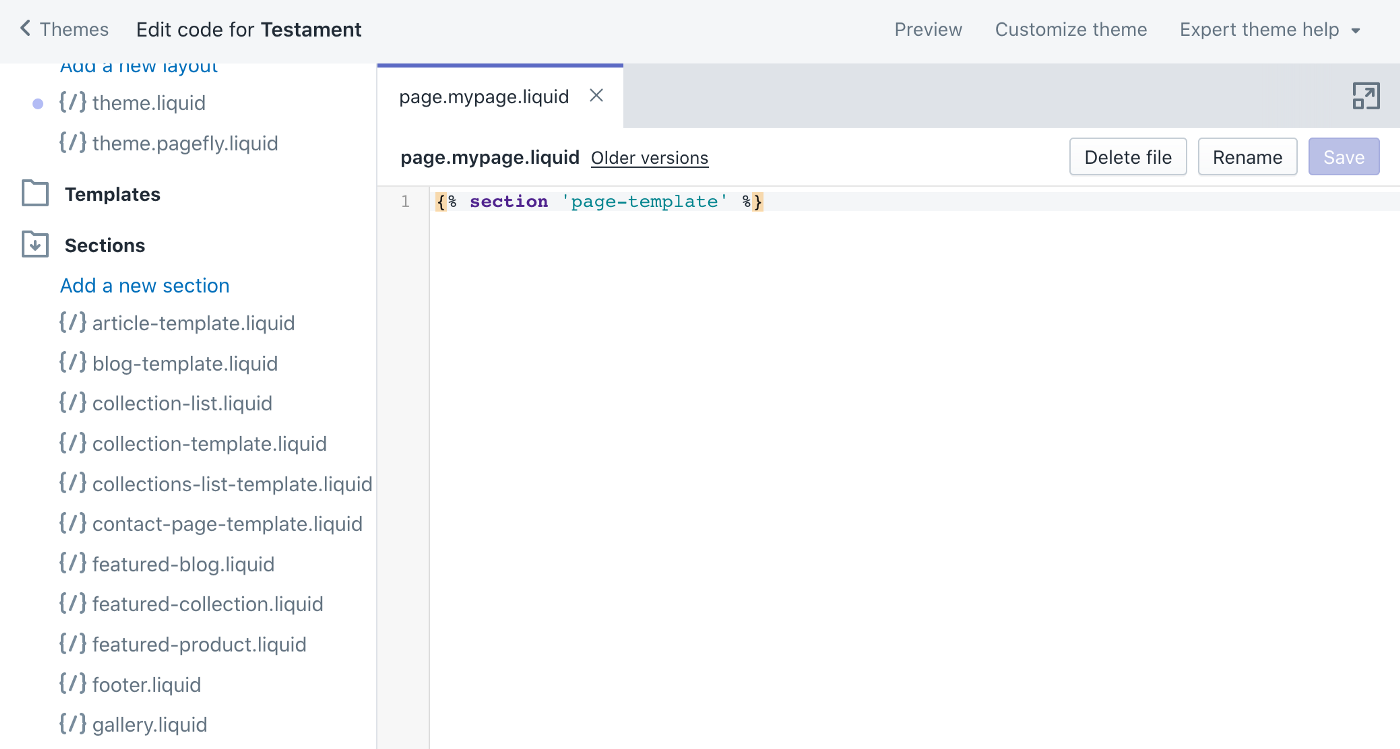
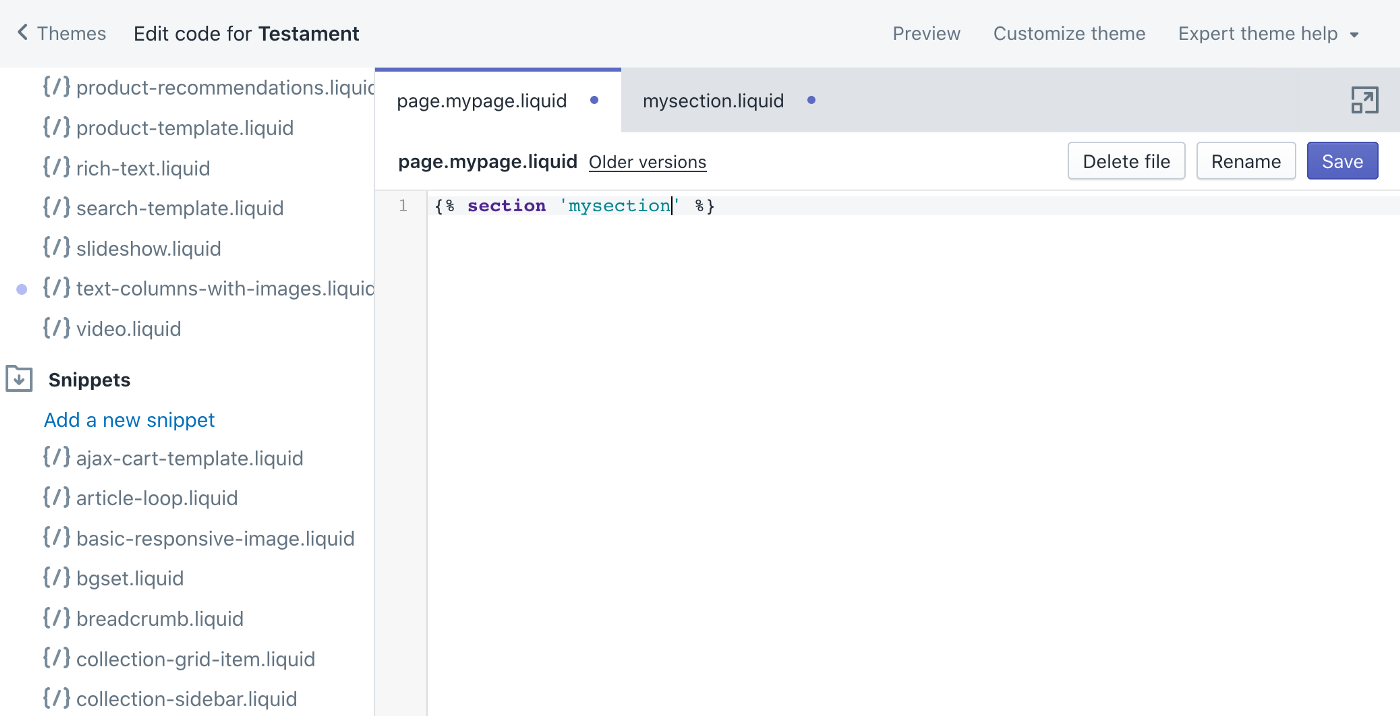
To put the section into the folio template nosotros have to refer to that page. To do that we have to substitute in the created page template (mine is page.mypage.liquid) the blueish 'folio-template' with the name of the section, in my example 'mysection'. And so there should now stand {% section 'mysection' %}
Want to read more than stories like this?
Get started
The commencement section of the page would now exist an prototype with text overlay. Now you could add multiple sections in the desired order. For the sit-in, I'll add a second section — the newsletter registration. To exercise that create a new section (eastward.one thousand. mysection2) and delete its automatically created content. Navigate and so in the sections folder to the newsletter.liquid and copy the whole content and paste it into the mysections2.liquid.
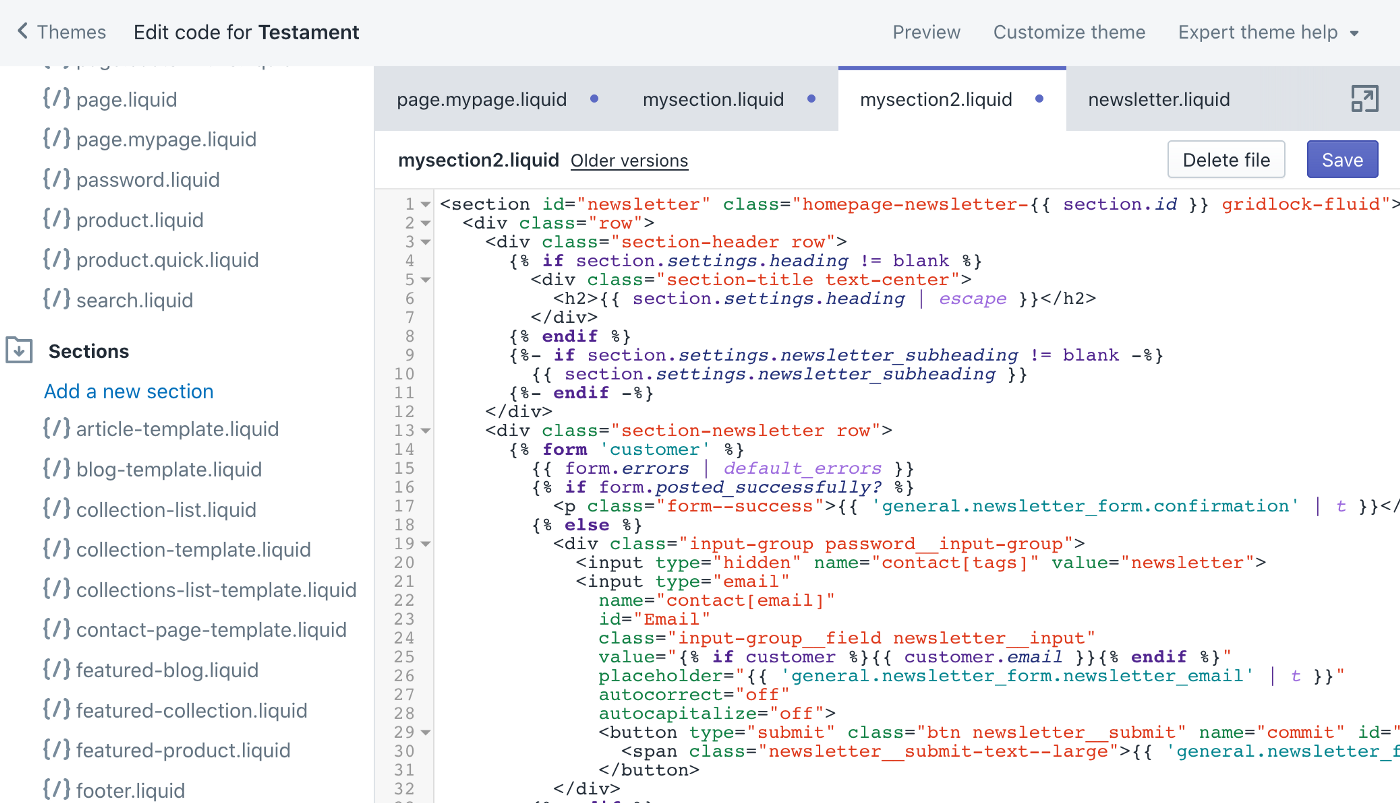
Add together then in the file folio.mypage.liquid a line and pass 'mysection2' in it.

Do not forget to save all files. Files having a majestic betoken in their tab take not been saved. Make sure to save all files before exitting.
To run into how the folio looks like we have to create a page. Navigate on the left side bar to Pages and click the button Add together page.
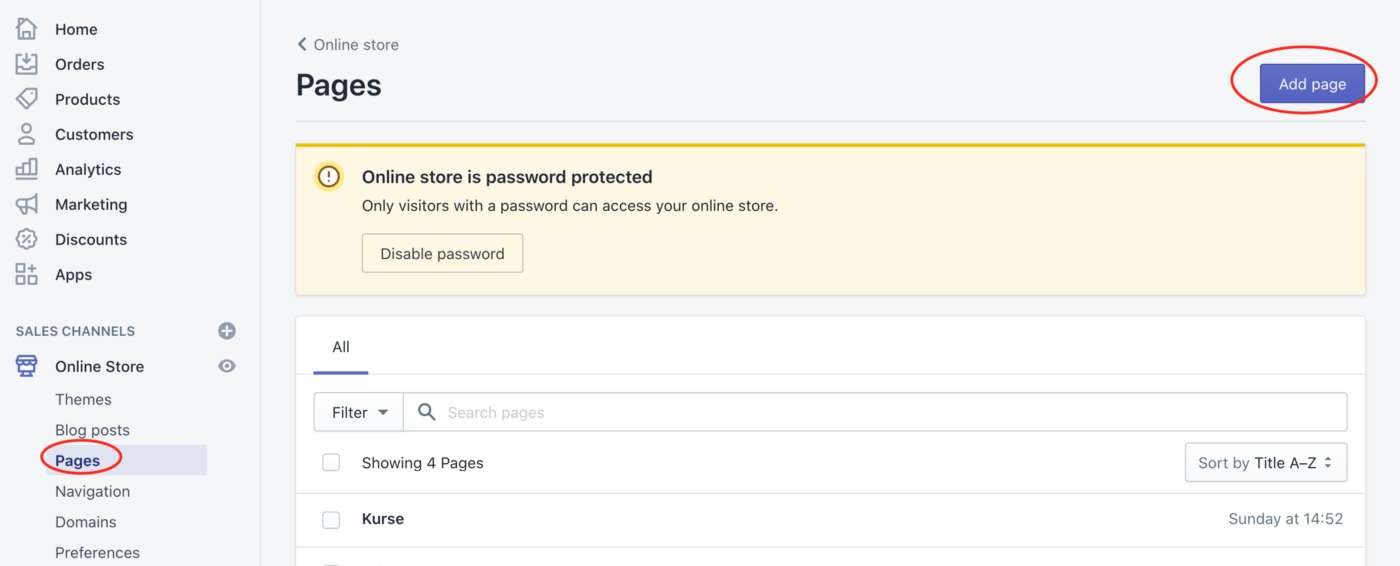
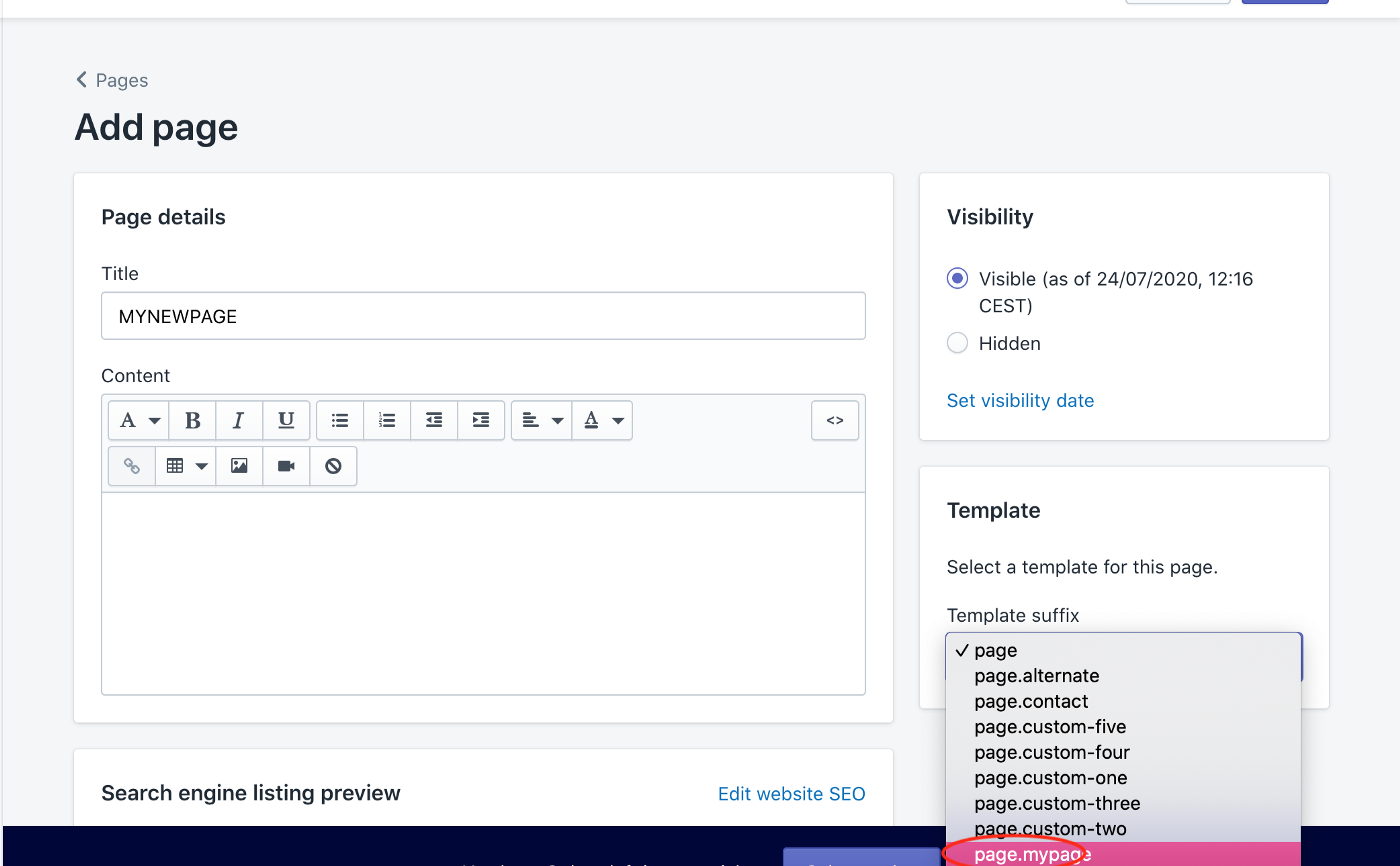
Type in a title for the page (due east.g. MYNEWPAGE) and select on the right side in the template menu your template. Mine is folio.mypage. Click then on salvage.
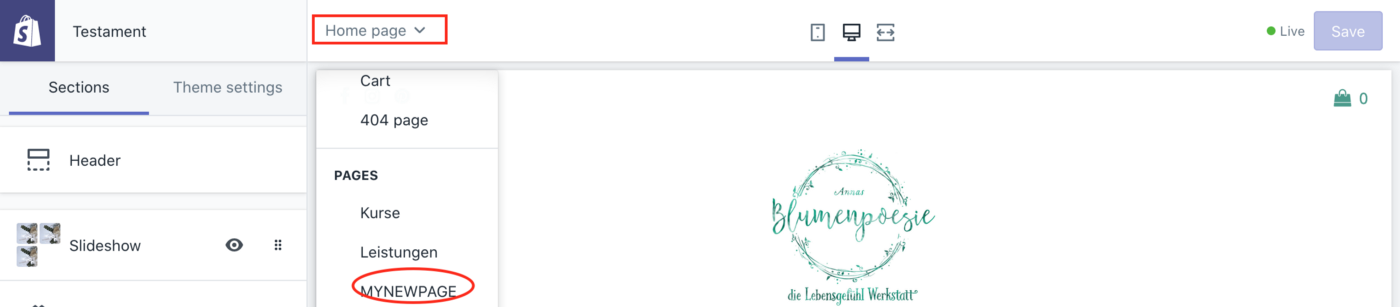
Now we need to navigate to the customizer. Click on the left side bar on Online shop and so on Customize.
Select in the dropdown card the name of your page and click on it.
On the left side bar you should see now your header, footer and in between the sections chosen (epitome with text overlay and newsletter).
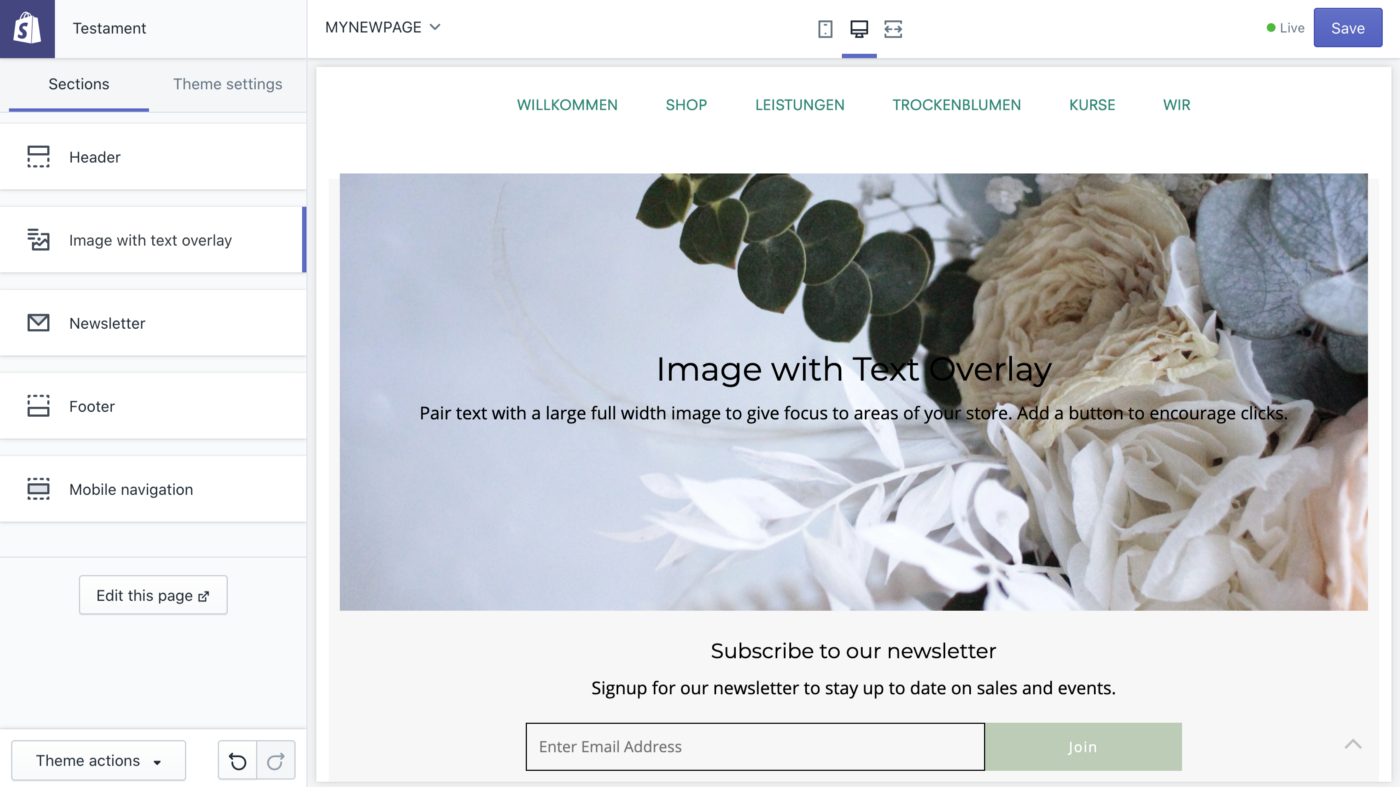
Click on it and edit all features such equally text, images etc. As always do non forget to save your progress.
In case this should not have worked for you, do information technology again and follow all steps slowly. Practice not forget to save the files. The nearly typical error is forgetting to save the input. That's information technology!
I hope you got new insights and enjoyed this petty Shopify tutorial.
I appreciate feedback !

Shopify Can I Add Section In Account Templates?,
Source: https://uxplanet.org/a-trick-to-create-beautiful-sections-on-every-page-in-shopify-78a10ed33e88
Posted by: morriswitts1986.blogspot.com
0 Response to "Shopify Can I Add Section In Account Templates?"
Post a Comment